The cats are deeply concerned about the cat sculpture. While this is unpleasant for them, I’m excited because it means the object says, “cat,” to them.
 Bleu is most concerned. One day, I was working on the armature – the cardboard, newspaper, and tape form I built for the cat shape – when Bleu came in the sun room. He stared at the “cat” and even fluffed up his fur. I invited him to make proper acquaintance of the cat, and he calmed down. He has been wary of the sculpture cat since then but no more fluffing. He stays at my side while I work on it, well until he gets tired and has to nap.
The idea for a cat sculpture started last year. In October 2014 I went with my dad to the exhibition of an art contest at the A.E. Backus Museum in Florida. The entries in the three-dimensional category were intriguing, and I conceived an idea for a cat sculpture I could enter in the contest the next year (ha!). I didn’t want to make a mosaic, which I know how to do, but wanted to try some new technique.
After searching around in the Web looking at sculptures and how-tos, I found Ultimate Paper Mache by Jonni Good. Not only does Jonni use materials that are easy to come by, but she also makes a lot of animal sculptures. A few years ago, she created a series of video tutorials about how to make a cat. When the student is ready, blah, blah, blah.
Huckie is my model. I measured him as closely as he would allow. The sculpture is substantially larger than Huck, so I think of it as the cat he fantasizes he could be.
I cut pieces of cardboard and glued bits of styrofoam to them for the base of the armature. Then, I taped wadded up pieces of newspaper on the cardboard structure. The next step in building the armature was adding cardboard ears. It took a few tries to get the ears into the shape I needed and the places I wanted them. Finally, I cut a piece of wire to help shape and anchor the tail. (Cheshire posted pictures of most of these stages yesterday.)
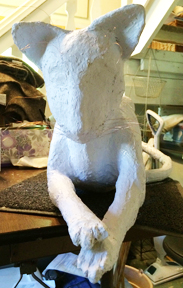
I finished the armature at about the same time the rain gods drenched Texas and the humidity was about 300 percent. Paper mache is based on flour and water, so covering the armature with the homemade paper mache clay was a no-go for weeks. Finally, in mid-July when the temperatures soared and the humidity had gone down t(o about 60 percent!), I made the paper mache clay and “frosted” the cat with a couple of layers. I added the whiskers before putting on the second layer of paper mache clay. The cat stayed up in the attic with a fan on him for a few days. When he was dry, I painted him with a periwinkle-tinted gesso but started to think that maybe he wasn’t completely free of moisture.
A paper mache sculpture has to be moisture-free or it molds from the inside out, so I put the cat to dry in the oven for a few hours last weekend before painting the underside of the sculpture. Once again Bleu thought we had an intruder in the house. He kept going over to the oven, meowing and posturing. Why? Baking acrylic paint releases ammonia – and god knows what else – so it must have smelled like some strange cat had peed in the oven.
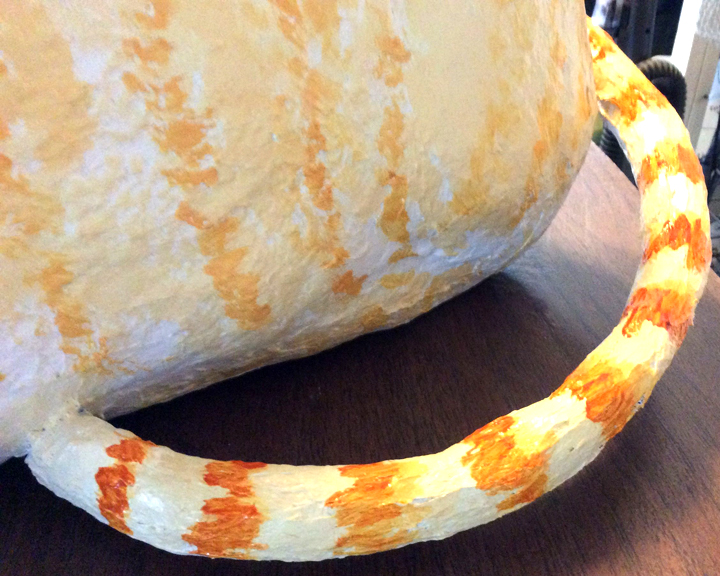 I started painting the cat today. The tail is first because it’s a small area where I can figure out how to achieve a truly catty effect with the paints. He has a cream-colored base with yellow ochre and quinacridone/nickel azo gold accents. (I’m using Golden and Liquitex colors, gesso, and media.)
I wonder what the furry cats will say about sculpture cat after I finish?